Recipe: Vegetable Beef Soup (WW Blue – less than 1 point per serving)

I made a WW-friendly vegetable beef soup today, and it is delicious! The video will walk you through how to make it. The recipe is below.

The soup base is:

1 lb. 96% lean ground beef (10 WW Blue points)

2-3 can diced tomatoes (0 points)

1 can tomato sauce (0 points)

1 quart beef broth (0 point)*

approx. 1 cup chopped onion, 1/2 cup chopped celery (0 points)

Salt and pepper, to taste (0 points)

Directions: Brown the ground beef in a large soup pot. Add the diced tomatoes, tomato sauce, and beef broth. Salt and pepper, to taste.

Now add your vegetables – I usually buy a bag of frozen soup vegetables. However, you can use fresh, frozen, or canned (drain canned vegetables) – corn, carrots, peas, beans, garlic, peppers, potatoes (count the points for potatoes).

Bring to a boil. You can add more beef broth if the soup is too thick. Let the soup simmer for a couple hours to thoroughly meld all the flavors.

This soup will keep in the refrigerator for several days, and it freezes well.

POINTS: I add additional beef broth, if needed, to bring my total amount to 18 cups – which equals 18 servings.

10 total points divided by 18 servings – .555 points (which rounds of to 1 point.

*Some beef broths scan as 0 points for a quart, and some scan as 1 or 2 points for a quart. It depends on the fat content of the particular broth you buy. Scan the broth you use to figure your points. However, even at 2 points a quart, the total still equals less than 1 point per cup/serving.


Recipe: Pigs in a Blanket

I wanted a hot dog – particularly a pig-in-a-blanket. And I knew I needed two things to make them: bread dough and hog dogs. First, the dough.

My Bizzy Kitchen has a pizza dough that can be used in many ways, and I like it much better than the 2-ingredient dough because it doesn’t have the strong tangy taste of the Greek Yogurt. You can find the recipe here. It’s quick and easy to put together. Make a batch of the dough, divide it into four equal portions. Put three of the portions into individual zip-lock bags. You can use those portions for individual pizzas or bagels or whatever bread product you’d like. The dough will be good in your refrigerator for at least a few days.

You will use the other portion (1/4 of the recipe) for these pigs-in-a-blanket.

Next, the hots dogs. Hebrew National has great hog dogs, and they have two that can be confusing – a “reduced fat” and a “97% Fat Free” version.

NOT THIS ONE!
THIS IS THE ONE TO BUY!

Get the HEBREW NATIONAL 97% FAT FREE BEEF FRANKS. They are only 1 WW Blue point each – and they taste really good!

Take four hot dogs out of the package. Take your dough (which is 1/4 of the recipe) and divide it into four equal portions. Take one portion and roll it into a long snake-like shape and wrap it around one of the hot dogs. The dough might be sticky – use just a little extra flour to make it workable

Sorry, but I forgot to take photos of the four pigs-in-a-blanket ready to go into the oven. However the other three looked just like the one shown above.

Note: I THINK that you could probably get away with dividing the dough into six portions and making six Pigs-in-a-blanket instead of four. It would bring down the number of points each, too. I intend to do that next time.

Bake at 400 degrees for about 15-20 minutes – until bread is nicely browned. The hot dogs are already fully cooked, and so you have to worry about whether they are done. As long as they’re hot, they’re good to go.

POINTS (WW Blue Plan)

1 Pig-in-a-blanket = 2 points (hotdog-1, dough-1)

2 Pigs-in-a-blanket = 5 points (hotdogs-2, dough-3)

3 Pigs-in-a-blanket = 7 points (hotdogs-3, dough-4)

4 Pigs-in-a-blanket = 9 points (hotdogs-4, dough-5)

A Better Cheesy Biscuit With Egg

My sister saw my post with the recipe for Cheesy Biscuits with Eggs, and she came up with a MUCH simpler way to make them. She took the dough for each serving, rolled it into a long “log” and then brought the edges together to form a circle.  So much simpler! And the egg fits into the hole much better, too!  

So here is the revised recipe:

Make the dough first. This makes four servings. 

1 cup self-rising flour (11 points)
1/2  teaspoon yeast (0 points)
1/2 teaspoon salt (0 points)
1/4  cup plain nonfat Greek yogurt (0 points)
1/4  cup warm water (0 points)
Pam cooking spray, butter flavor (0 points)
 
  • Preheat the oven to 475 degrees.
  • Prepare a small baking dish with a sheet of parchment paper or a spray of butter-flavored PAM.
  • Set aside about 1/4 cup of the flour to use later.
  • In a bowl, mix 3/4  cup of the flour with the yeast and salt. 
  • Add the yogurt and warm water and mix well. You should have a sticky ball of dough
  • Sprinkle some of the reserved flour on a clean counter or pastry mat. (I actually used a paper towel).
  • Dump out the dough onto the floured mat.
  • Sprinkle more of the reserved flour on the dough, gently fold it over, and repeat until a good ball of dough is formed. Knead the rest of the flour into the dough.
  • Spray your hands with Pam, take the dough and form it into 4 balls of equal size.
  • Note: If you want to make only one or two servings, before cooking at all, wrap the unused dough in a ziplock bag and keep it in the refrigerator till you’re ready to use it. The extra can be used for this recipe, pizza dough, or any other dish requiring bread.
  • Roll each ball into a long log shape and then press the ends together to form a circle, and place the 4 circles on the baking sheet.  Make the circle large enough to hold an egg in the middle. 
  • (optional) Let rise for about 30 minutes. This step will make the dough rise more, but it is delicious without this step.
  • Bake at 475 degrees for about 4-6 minutes until puffed but not browned.
  • Remove baking sheet from oven.

Toppings: Here is a photo of my toppings – chopped tomatoes, grated Cabot 75% reduced fat cheddar cheese, a slice of Canadian bacon, finely chopped onion, chopped spinach leaves.

  • Working quickly so the biscuit doesn’t cool too much, place a slice of Canadian bacon underneath each of the biscuit circles.
  • Crack an egg into each biscuit cup. If you look at the photos below, you will see that the egg white flowed over the top of the biscuit, but it was okay. When I took them out of the oven, they were fine. 
  • Season with salt and pepper. Add other toppings, as desired – just keep track of the points.
  • Return the baking sheet to the oven and continue baking until the biscuits are golden and the egg whites are set, about 10 minutes more.


(Photo below) It’s ready to go in the oven! I’ve piled on so many toppings that you can’t even see the egg except for where part of the white overflowed at the top of the photo. You will see in the next photo that after it has cooked, the white overflowing doesn’t make any difference – still delicious!


And here it is – ready to eat.  Absolutely delicious!

Counting the points: Each biscuit (4 biscuits per recipe) is 3 points. Add the points for any toppings you add.

You’ve got to get momentum

idenk > Supporting Teams > Are You In A FFO?The dictionary defines momentum as “strength or force gained by motion or by a series of events.” After two weeks of gaining weight while completely sticking to my WW plan, I realized my enthusiasm for sticking with my commitment was compromised – and I yielded to that lack of enthusiasm over the weekend. It’s almost humorous to think of the things that I eat when I’m feeling defeated.  It varies. This time it was Rice Krispies Treats. I actually lost count of how many I ate. I logged it as 8, and I think that’s accurate . . . but I’m not 100% sure.

Adam Braun Quote: “For any movement to gain momentum, it ...

I was starting down a familiar path – that of thinking about what a loser I am – except for weight – can’t seem to lose that. How I start things and don’t finish them. How I have never successfully lost weight and kept it off long term. Those voices in my head were gaining strength.

I stopped, though. Did I want those voices to gain momentum like they have in the past, or did I want to change direction and gain momentum in a positive direction?

You know what stopped me? Last week in one of the Facebook WW groups that I’m in, someone wrote something about how we should stand naked in front of mirror and name ten positive things about our bodies. I did that a few days ago – and I couldn’t come up with ten. I could only see the negatives – the extra weight, the scars, the blemishes. I wondered if maybe in my heart I feel I don’t “deserve” to be at a healthy weight.  I also wondered what made me become so hard on myself – so critical and unforgiving. Why is self-judgment my go-to response?

This morning when I woke up, I knew I had to stop, change course, and build some momentum away from Rice Krispies Treats and towards success. One success builds momentum towards another success. It all goes back to the Atomic Habits I’ve written about several times before.

So I logged my breakfast, and then left to run a bunch of errands – first I had a dentist appointment, then to the post office and UPS office to mail packages. I picked up some papers at my husband’s office and made a quick grocery store stop for fish and some herbal teas.  Except for the dentist office, those were errands I’d been putting off since last week. I got it all done. I felt good about handling so many little nagging errands. I stopped by Chick Fil A and had their grilled chicken nuggets for lunch. I got only the nuggets. No, I assured them, I didn’t want to “make it a meal” with fries and a coke.

7 Techniques How To Get Motivated To Do Anything

I came home and felt good. I did some work around the house, took a 20-minute nap and, with my husband, planned our dinner.

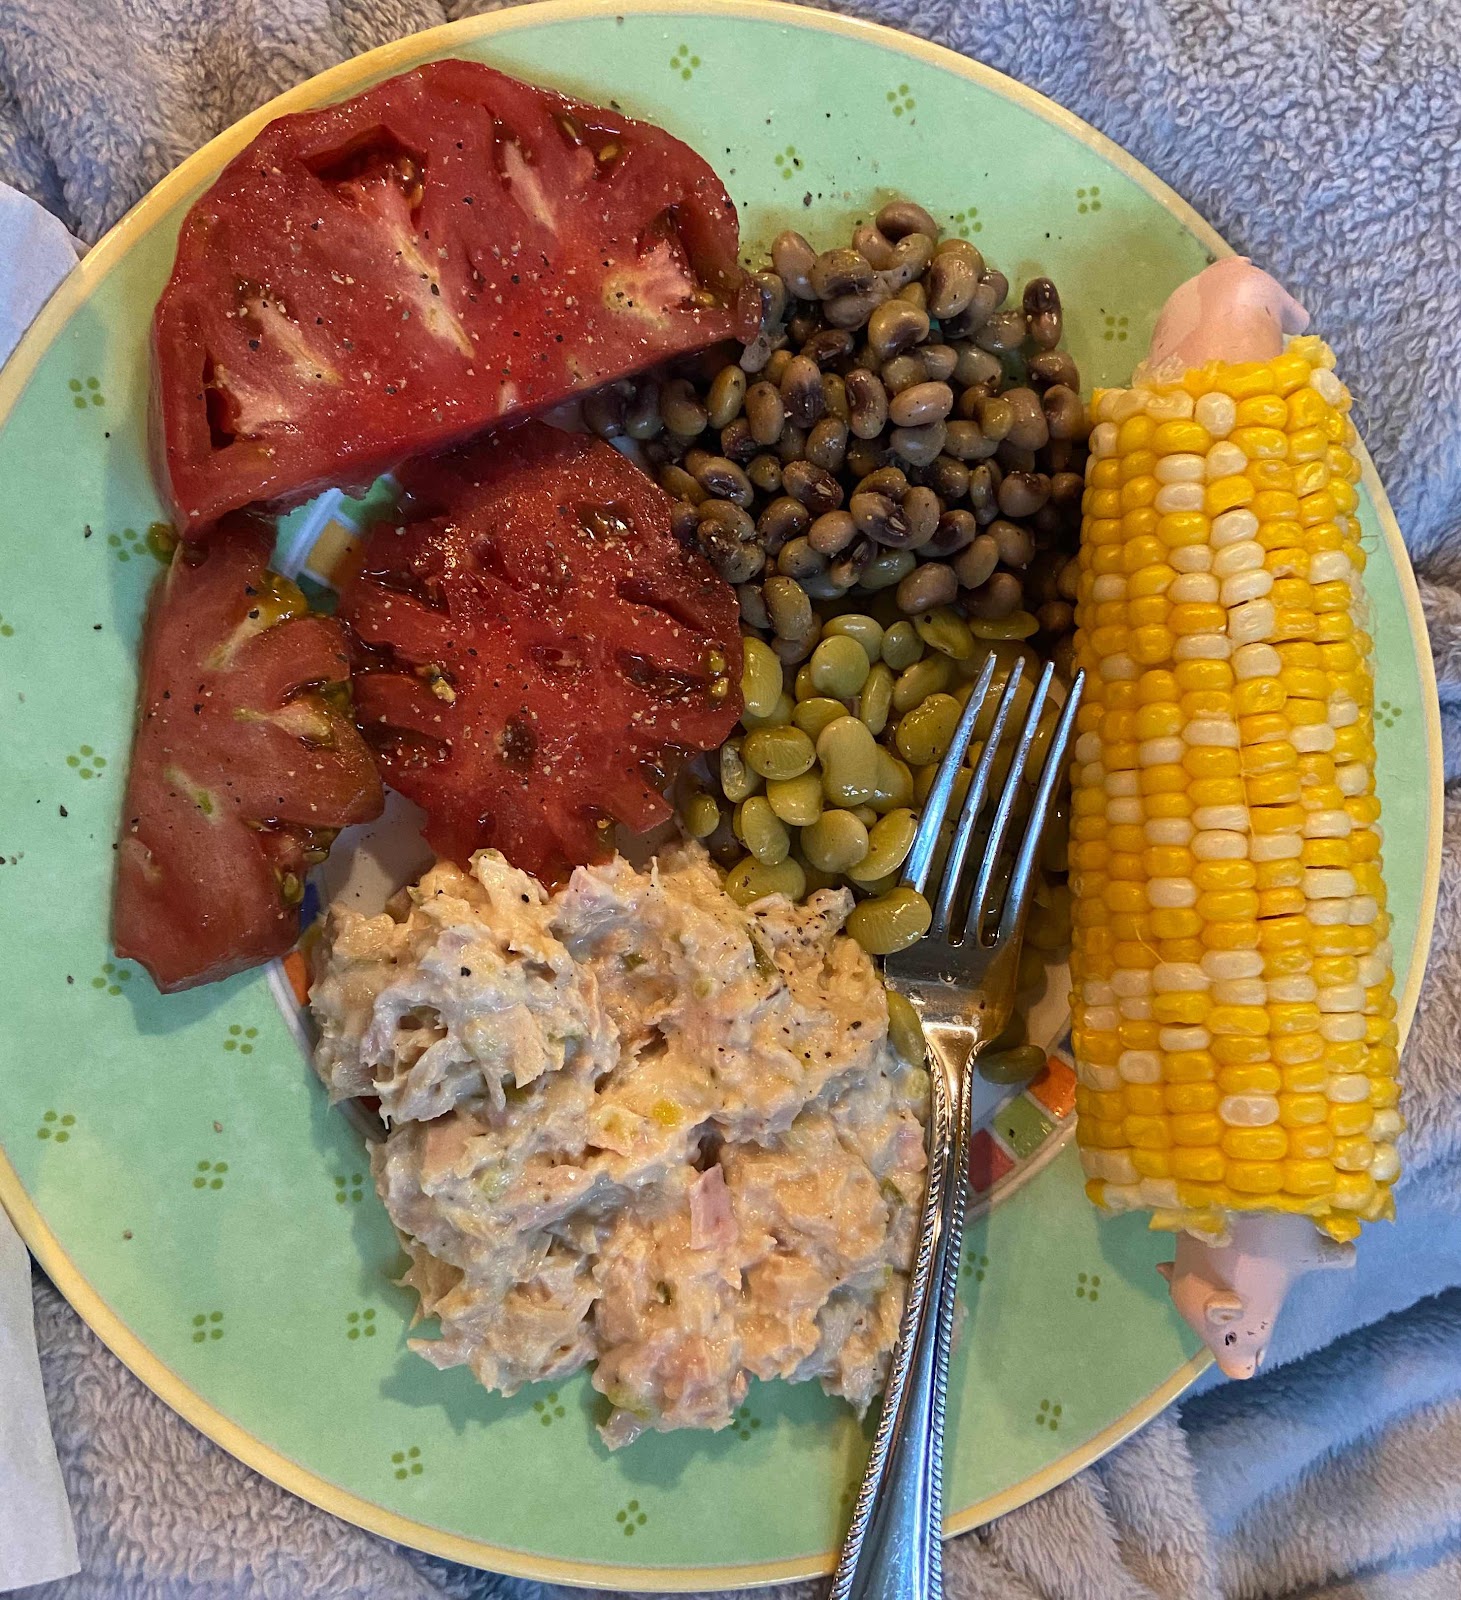
Today was my STOP-REASSESS-CHANGE COURSE day. I started with a small act (handing errands I had been procrastinating on since last week). I continued to build momentum by sticking to only grilled chicken for lunch.  And then I had fish and vegetables for dinner. Snacks were all low point and moderate-sized servings. I’m ending the day having used only 19 of my 23 daily points. The extra points will roll over into my weekly points, which is good since I used so many weekly points yesterday.

Momentum. I learned I can get it back or shift its direction simply by stopping and deliberately doing something in the direction I want to go. That success moves me to another success, and so it goes.

And one day soon, I intend to do the naked-in-front-of-the-mirror thing again. This time I will come up with ten positive things. After all, this body has seen me through 71+ years of life, it grew two amazing babies, rocked children and later grandchildren to sleep. I like my green eyes and the fact that my hair has just a little natural curl to it. That’s a good start.

Being overweight is hard. Losing weight is hard. I have to choose my hard, and I choose losing weight.


Baked Cheesy Biscuits with Eggs (4 points each, WW Blue)

The idea for these came from my sister, Janice, who posted the recipe on Facebook.  It’s a White Lily Flour recipe.  I revised it to better fit in with the WW Blue Plan, and I actually came up with a couple of variations. These are 4 points each (WW Blue Plan) if you use the Velveeta slices, and 3 points if you use the Canadian bacon. I had one for dinner tonight, and I am stuffed!

Here’s the recipe:

Baked Cheesy Biscuits with Eggs

1 cups self-rising flour (11 points)
4 eggs (0 points)
1/2  teaspoon yeast (0 points)
1/4  cup plain nonfat Greek yogurt (0 points)
1/4  cup warm water (0 points)
1/2 teaspoon salt (0 points)
Pam cooking spray, butter flavor (0 points)
4 slices Velveeta cheese (6 points) OR 4 slices Canadian Bacon (1)  OR a combination of both. Just figure out the correct points.
Pam Cooking Spray, No-Stick, Butter Flavor (0 points)
salt/pepper, to taste
Other toppings you might want to add: spinach, onion – whatever you like.
  • In a large bowl, mix 3/4  cup of the flour with the yeast and salt. Reserve the extra 1/4 cup of the flour for later.
  • Add the yogurt and stir until it starts to form a ball.
  • Add the warm water and mix well. You should have a sticky ball of dough.
  • Sprinkle some of the reserved flour on a clean counter or pastry mat. (I actually used a paper towel).
  • Dump out the dough onto the floured mat.
  • Sprinkle more of the reserved flour on the dough, gently fold it over, and repeat until a good ball of dough is formed.
  • Spray your hands with Pam, take the dough and form it into 4 biscuits of equal size.
  • Take a small round cookie cutter and cut out a hole in each biscuit. Place the cut out rounds and the larger biscuits on a baking sheet lined with parchment paper. You can push on the inner circle to widen it.  Trust me, you want that circle to be big enough to hold an egg!  Those circles that look so big in the photo close in a lot when they cook!
  • Spray the tops lightly with butter-flavored Pam.
  • Let rise for about 30 minutes.
  • Bake at 475 degrees for about 6-8 minutes until puffed but not browned.
  • Remove baking sheet from oven.
  • Either drape a slice of cheese over each of the large biscuits – using your finger to press it into the opening to form a deep cup, OR make four cuts on a slice of Canadian bacon (see photo) and overlap the edges to tuck it into the opening to form a deep cup. 
  • Crack an egg into each biscuit cup. If you look at the photos below, you will see that the egg white flowed over the edges of the biscuits. I worried, but when I took them out of the oven, they were fine. I even had a yolk roll over the edge of the biscuit. I just scooped it up with a spoon and put it back. LOL!
  • Season with salt and pepper. Sprinkle other toppings – grated cheese on the ones with Canadian bacon (measure and count the points), chopped spinach leaves, etc.
  • Return the baking sheet to the oven and continue baking until the biscuits are golden and the egg whites are set, about 10 minutes more.
  • Serve immediately.

Notice in the photo above, the egg white that flowed out into the pan. It was fine! The top two have the slice of Velveeta, and the bottom two have the Canadian bacon. I liked the ones with the Canadian bacon best – and they were one point lower! Both were delicious, though!  A serving includes one of the large biscuits with the egg in the middle along with one of the smaller cutouts.

Zero-Point Taco Soup

The weather has turned cooler, and I saw something on Facebook about Zero-Point Taco Soup. I didn’t need persuading – that immediately became what I would make for dinner. I didn’t have taco seasoning on hand, and so I made a quick trip to Kroger to get some.

Within ten minutes of getting home, the soup was simmering on the stove. What could be simpler than opening a bunch of cans, a package of chicken breasts, and some seasoning, and dump it all in the cooking pot! The only other step was to shred the chicken after it had cooked.

I served it with a dollop of nonfat Greek yogurt (instead of sour cream) and a little grated Cabot 75% Reduced Fat Sharp Cheddar Cheese. Both of those are 0-points, too. If I used more (half ounce +) of the Cabot cheese, it would move to a point, but I kept it under 1/2 ounce. It was both tasty and filling. It tasted so good, I had a second bowl – and I counted the cheese as 1 point since I had two helpings of it!

The soup freezes well. So I will put some in the refrigerator to eat over the next couple days, and I will put some in the freezer to enjoy again in a few weeks.

Here is how I made it:

Zero-Point Taco Soup

  • 4 cans beans (black beans, kidney beans, pinto beans, great northern beans – whatever kind you like or a combination of beans. I used Kroger’s Tri-Bean Blend)
  • 1 can diced tomatoes
  • 1 large can tomato sauce OR pureed tomatoes
  • 1 qt. chicken broth (you can use less if you want your soup to be thicker)
  • 2 Tablespoons taco seasoning (add more or less, depending on your taste)
  • 1 lb. boneless/skinless chicken breasts
  • diced onion, peppers, garlic – to taste (can use fresh or dehydrated)
  • salt/pepper to taste

Directions:

  1. Dump everything into a large saucepan (or crockpot)
  2. Bring to a simmer
  3. Once chicken is cooked through, take it out, shred it, and add it back into the soup.
  4. To serve, you can top with sour cream or Greek yogurt, grated cheese, corn chips – whatever toppings you like

Zero Points on WW Blue Plan. Be sure to add points for any toppings you choose.

7-Point Pizza (WW Blue)

I made personal pizzas tonight – one for my husband and one for me.  Pizza is one of my all time favorite dishes!  The last time we had pizza was during the summer when I ordered one from Domino’s Pizza, and it was less than delicious. It was so bad, in fact, that it turned me off from wanting pizza for a couple months.  However, lately after eating so much chicken and tuna and lean beef, I have yearned for something a little more indulgent.

After reading about 2-ingredient dough, and then researching and finding an even better (supposedly) dough recipe, I decided to give home-made pizza another try.

First the dough. I got the recipe from My Bizzy Kitchen. Here’s that recipe:

Dough:

2 cups self-rising flour

1 teaspoon yeast

1/2 teaspoons salt

1/2 cup Fage Fat Free Greek Yogurt

1/2 – 3/4 cup warm water

  • Heat oven to 450 (see notes).
  • In a bowl, mix the flour, salt and yeast together. Stir in the yogurt and mix until it starts to combine. Start with 1/2 a cup of water and see how the dough comes together. If there is still a bit of loose flour in the bowl, add a couple tablespoons of water at a time, until it forms a ball.
  • This dough can be used within an hour of making, but truth be told, I normally don’t use it until day 2 or 3. On the first day I let it rise in my microwave all day, then store it in a ziplock bag.
  • On the day of baking, add a tablespoon of flour on your counter. Wet your hands and grab desired amount of dough for your pizza. Most of my individual pizzas are 5 ounces. Top with desired toppings and bake for 10 minutes, or until desired doneness.

I didn’t  put my dough in the microwave to rise. As a matter of fact, I didn’t let it rise at all because we were making pizza right away.

I divided the dough into four equal parts. We used two of those for our two individual pizzas tonight. I put the other two parts in a Ziplock bag in the refrigerator for pizza later this week. (Note added: We used the extra dough three days later for another two pizzas, and it was perfect! So it keeps well in the fridge for at least three days). The flour is the only ingredient with points. So each of the four parts contain 1/2 cup self-rising flour – which is 5 points on WW Blue Plan.

The photo above shows our two pizzas ready to go in the oven. That’s mine on the bottom – and Ron’s at the top. He added additional sauce on top of his other ingredients. It looks like a barbecue pizza, but it isn’t – just lots of pizza sauce! That’s because he doesn’t usually each much pizza crust because of his blood sugar. Thus, he wanted to be sure he had plenty of the toppings.

In the photo above, the pizzas are on a pizza stone that I bought from Pampered Chef years ago. I had put the pizza stone in the oven while I made the dough. So it was piping hot when we put the dough on it.

I sprayed my hands with butter flavored Pam to smooth out the dough on the pizza stone. Then once we had it spread out, my husband and I added our favorite toppings.

Toppings

These are the toppings I put on my pizza:

Onion, finely chopped (0 points)

fresh spinach, torn into small pieces (0 points)

fresh chopped tomatoes (0 points)

Ragu Homemade style Pizza Sauce (1 point for 1/4 cup)

Sargento Light mozzarella string cheese (1 point per stick), cut crossways into thin circles. In the photo above, you can see the small circles of mozzarella.

3/8 oz Cabot Cheese, Sharp Cheddar, 75% Reduced Fat (0 points for 3/8 oz.)

At the top of this post is a photo of my baked and ready-to-eat pizza. I forgot to take a photo until I had cut it and put the pieces on a plate.  It was delicious! The crust has a little bit of a tangy taste from the yogurt. I really liked it. One great thing about this recipe is that the dough took only a few minutes to put together. And, of course, the toppings were delicious.

And the best thing of all is that the whole pizza is only 7 points. My first pizza in over two months. And I still have 5 points left for today!

Eating well and losing weight affects one’s blood pressure

Today I have not been feeling well – headache and a little light-headed. Oh great, I thought, I’m coming down with Covid-19. However, one of my sisters advised that I take my blood pressure since a low BP could cause one to feel light-headed. So I did – four times over the course of about 30 minutes because I’m compulsive like that. Here are the readings:

117/58       98/57       110/58      110/59

It’s a fairly consistent reading – especially for the second number.  And all four are too low. That could easily account for the light-headed feeling I’ve had – and maybe for the headache, too.

I take BP meds each evening. It’s a fairly low dose, but I’m thinking that with my healthy eating the past 7 weeks, plus losing some weight, that it has affected my BP.  So tonight I will cut my dose in half. I will continue to monitor my BP, and hopefully it will be better after a day or two.

What does “mindfulness” look like?

For the tagline to this blog, I wrote: “A journey of health, fitness, and mindfulness after the age of 70.” So far I’ve written a lot about health via all my WW posts. However, I haven’t written much at all about fitness and mindfulness. So today I will talk about mindfulness.

With all that’s going on in the world today, it is easy to have one’s mind full to bursting with all the news about riots, diseases, unrest, quarantines, etc.  “Experts” weigh in with opposing views on just about everything. That makes it all the more important to deliberately be mindful and to foster mindful practices in everyday life.

Mindfulness can be defined as the nurturing practice of being aware of one’s environment, thoughts, emotions, and experiences “in the moment” while remaining kind and nonjudgmental to oneself and others.

Being mindful is no small accomplishment! How am I kind to myself?  How do I nurture positive behaviors in order to take care of myself?  First – back to the other posts I’ve made in this blog – I am being nurturing and kind to myself by taking better care of my body via eating well and following the WW plan.

Mindful eating is really what WWs is all about.  One unhealthy habit I have is that I quickly eat most of my meals sitting in my recliner either watching TV or scrolling through my phone or laptop. I would like to replace that habit with a more nurturing one – sitting at a table with soft music playing – slowing down and being mindful of taste and texture – drinking plenty of water along with the meal.  TODAY I will start with dinner each day – at the dining room table, music from my iPhone, talking with my husband.

What does mindfulness look like right now in my life?

  1. I’ve recently started a skin care regimen. I’m fortunate in having a good inheritance when it comes to my skin. I’ve never had to do much to have good skin. However, now that I’m in my 70s, the wrinkles are more apparent. Rather than going to bed without removing my makeup first (something I’ve always done!), I’ve started washing my face with a good skin care product (Rodan + Fields), using a toner, and then a face cream.  In the mornings, I apply a sunscreen before applying makeup. I consider it a soothing and relaxing way to prepare for bed.
  2. In the mornings, I’ve started back having my quiet time. I did this for year before, but in the past couple years, I’ve let it slide.  During my quiet time, I read the Bible, keep a prayer journal, and read a devotional – all while enjoying my morning coffee. It is delightful way to start the day, and it’s a “centering” practice.
  3. I make my own healing skin cream. I am a “picker” – meaning if there is any blemish on my skin, I tend to pick at it. It is a habit that is SO hard to break! There’s something about the lack of smoothness that makes me feel compelled to try to make it smooth by scratching at it. So I made my own healing cream that I put on any blemish to help it heal quickly.   I mix it in a bowl and put it in small 2-oz. cosmetic jars. And I’m making a concerted effort to stop the picking! I have made my own regular skin cream for the past year, too. I prefer both the skin cream and the healing cream over any commercial cream I’ve found. It’s not only a self-care practice, it helps to foster my creativity.
  4. I do mindfulness walks around our yard. That was something I started at the beginning of the Covid-19 quarantine in March 2020.  We are fortunate to have some acreage where I can walk. I try to get outside in the sun on a daily basis and just walk around, breathing deeply, for a few minutes each day.
  5. I’m working on more regularly keeping my home clean and neat because a clean and organized environment fosters calm and peace. Yesterday I cleaned out my closet (again!). The pantry is next. Then my art studio. The rest of the house stays fairly clean and neat.
  6. With SO much discord in the world right now, I have avoided the news as much as possible for a long time. I get most news via the internet – but I can select news outlets that don’t have obvious biases. I want to form my own opinions rather than be told what to believe – which is what most news outlet do. That way I can be informed without being manipulated into getting upset or angry.
  7. My Apple watch is set to regularly remind me to breathe deeply throughout the day. Sometimes just taking a deep breathe is calming.

Balance is another aspect of mindfulness, and I think I do a pretty good job of that. I work around the house or paint or cook or whatever, but I also take breaks, I write, and I visit family and friends.

A 3-Point Dinner

Tonight’s dinner was straight from the farm stand – except for the tuna. The ONLY points came from the light mayonnaise I used in the tuna salad. I also used a little Fage plain Greek yogurt in order to limit the amount of mayo.  It was a delicious dinner – and I couldn’t finish it all.

And here is how it is logged in my WW account.